NextTuesday MIDI expander
Welcome to adding MIDI to your NextTuesday. There are few steps involved here:
- Update your NextTuesday with the latest firmware
- Assemble your NT expander and attach to your NextTuesday
- Plug everything in and play with your new MIDI powers
Update the NextTuesday firmware:
This new firmware includes the feature needed to use the MIDI expander. It also includes a few small interaction upgrades and 2 new musical scales. Go to https://www.thisisnotrocketscience.nl/service/nexttuesday/ and follow the instructions.
Assemble your NT expander:
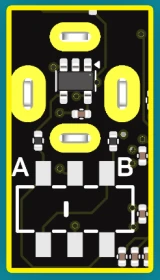
Your expander has a little arm to hug your NextTuesday that you shall attach.
Remove the power cable from the back of your NextTuesday module. Attach the yellow connector to the expander first, by calmly sliding it over the yellow pins – all the way down. Make sure the smiley face below the connector is right side up. Then attach the other yellow connector to the yellow pins on the NextTuesday module. Tada! Put the power cable back into the module and connect everything to your case.
Play with your MIDI powers:
Our NextTuesday MIDI expander has four jacks: MIDI IN, MIDI TRU, MIDI OUT & another MIDI OUT. The MIDI IN jack patches MIDI data directly into your NextTuesday which will pick out clock/note data. MIDI TRU is an output that passes any MIDI you patch into the IN through so you can apply it elsewhere. Both OUTs give you the note/clock data of the NextTuesday so you can MIDI sequence anything.
Depending on what you plug into the MIDI IN NextTuesday will go into different modes:
If you give it only clock information your NextTuesday will continue to do its own thing synced to the given clock. However, if you feed it any notes via MIDI IN your NextTuesday stops making melodies and instead converts your given notes into 1V/Oct and gate information. Notes coming in on MIDI channel 1 go to the NOTE (1V/Oct) and GATE (gate) outputs. MIDI channel 2 goes to MOD (1V/Oct) and ACCENT (gate), while MIDI channel 3 goes to LOOP out (gate) and MIDI channel 4 goes to BEAT (gate) and MIDI channel 5 goes to TICK output (gate).
Now, because there have emerged two standards within MIDI you have a choice to make as to what standard all your MIDI outs are going to adhere to. On the back are switches that you can set to either protocol A or B – there are three switches corresponding to the TRU/OUT/OUT. Don’t worry about the inputs, they can do both (courtesy of LPZW).